


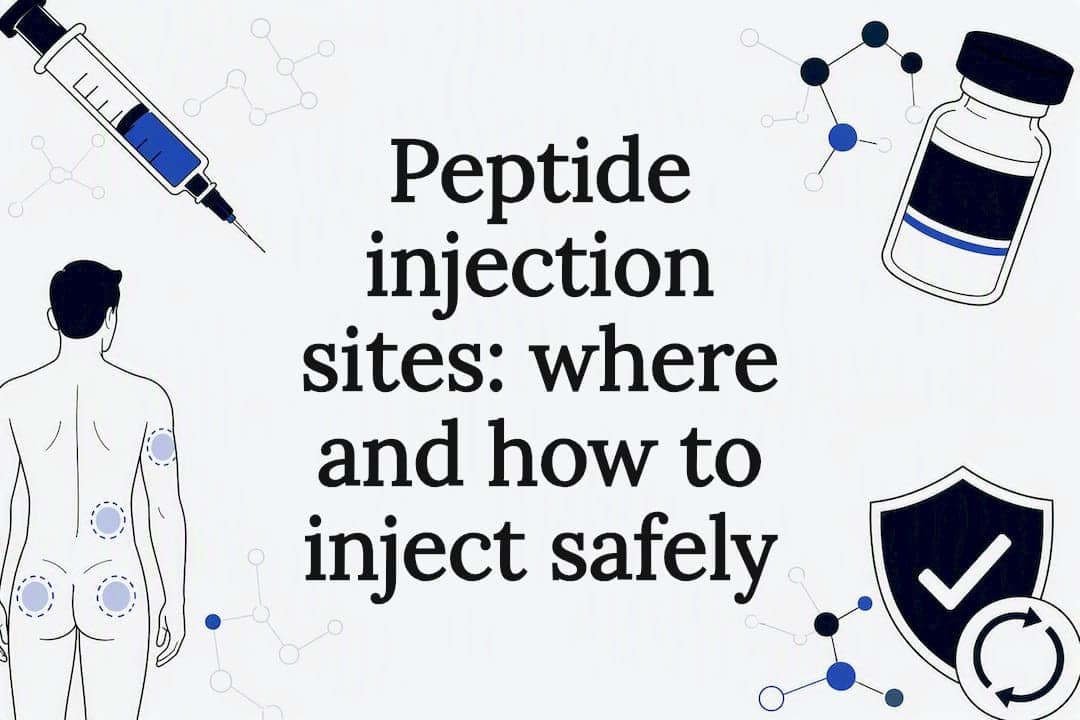
Most peptides taken for systemic effect go into the fat just under your skin, not the muscle. The main zones commonly used are your abdomen, the flanks (love handles), the outer thigh, and the back of the upper arm, and the single most important rule is to rotate between them. Pick a healthy patch of pinchable fat, avoid scars or bruises, and follow a rotation schedule to help protect the tissue and ensure steady absorption.
- Standard subcutaneous zones: abdomen (2 inches from the navel), flanks, outer thigh, back of the upper arm.
- Safety rule: have your first injection demonstrated by a clinician, and never guess at dose or route.
Pro Tip: Stop and get medical attention if you notice severe pain, spreading redness, fever, or any other sign of infection at the injection site.
Key Takeaways
Safe peptide injection depends on rotating through subcutaneous sites, using the right needle gauge and angle, and stopping immediately if warning signs of infection or reaction appear.
| Point | Details |
|---|---|
| Use the four standard zones | Abdomen, flanks, outer thigh, and upper arm all offer enough pinchable fat for safe rotation. |
| Match needle to technique | A 29 to 31 gauge needle at 90 degrees (45 for lean individuals) reduces pain and risk of hitting muscle. |
| Rotate at least 1 inch | Move a finger-width from the last site and let any spot rest about a week before reuse. |
| Watch for red flags | Spreading redness, fever, or severe pain means stop and call your prescriber the same day. |
| Source high-purity supplies | Soma Peptide supplies clinically tested compounds with high purity along with reconstitution ancillaries for prescribed use. |
This article is general information, not a substitute for advice from a qualified doctor. Consult a qualified healthcare professional about your own circumstances before acting on anything here.
Table of Contents
- What you need before every peptide injection
- Where are the best injection sites for peptides?
- How do you actually inject a peptide step by step?
- What needle gauge and length work best for subcutaneous peptides?
- How often should you rotate injection sites?
- How do you deal with injection soreness or bruising?
- When should you stop and call a clinician?
- How should you store and dispose of your supplies?
- Why does rotating injection sites actually matter?
- A note from Soma Peptide on injecting safely
- Where to find validated peptides and supplies
- Sources
- FAQ
What you need before every peptide injection
Lay out your supplies before you touch the vial. Fumbling for an alcohol swab mid-injection is how contamination happens.
- An insulin-style U-100 syringe or the pen device that came with your peptide
- An ultra-fine needle, typically 29 to 31 gauge and 5/16 inch (about 8 mm) or shorter
- Alcohol swabs, sterile gauze or an adhesive bandage
- A sharps container (a purpose-built one, not a repurposed jar)
- Clean hands and a flat, wiped-down surface to work on
Check the product label before you draw anything up. Some peptides ship as lyophilized powder and need bacteriostatic water for reconstitution, and the ratio matters for accurate dosing. Your prescriber’s instructions on route, frequency, and volume override anything general you read here.
Pro Tip: Use a fresh needle every single time, even if you’re drawing from the same vial you used yesterday. A dull tip drags on tissue and hurts more than a sharp one, and a reused needle carries more bacteria than you’d think.
Where are the best injection sites for peptides?
Four zones give you enough pinchable fat and rotation room to inject safely for months on end. MedlinePlus and the Cleveland Clinic both anchor their patient guidance around this same map.
Abdomen. Stay away from the navel in any direction, avoiding the immediate area around it. This is usually the easiest spot to self-inject because you can see it and pinch it with one hand.
Flanks (love handles). The soft tissue on the sides of your lower torso, just above the hip bone. Good backup zone once your abdomen needs a rest.
Outer thigh. Front and outer portion of the upper thigh, not the inner thigh, where nerves and blood vessels sit closer to the surface.
Back of the upper arm. The fatty pad over the triceps. It works, but reaching around to pinch it yourself is awkward. Save this one for days when someone can help you, or skip it if you’re injecting alone.
Whatever zone you pick, the skin needs to be healthy. Skip anything scarred, bruised, lumpy, tattooed, or visibly irritated, and never inject into skin that looks infected. A simple body map, even a printed outline you mark with an X and a date, makes it far easier to see at a glance which quadrant you used last and which one is due.
Pro Tip: Work across zones in a fixed order, left abdomen, right abdomen, left flank, right flank, and so on, instead of picking randomly. A pattern is easier to remember than a memory.
How do you actually inject a peptide step by step?
1. Wash your hands. Soap and water for at least 20 seconds, or a hand sanitizer if soap isn’t available. Skipping this step is the single easiest way to introduce bacteria under your skin.
2. Draw your dose and clear air bubbles. If you’re using a vial and syringe, draw slightly more than your prescribed dose, then hold the syringe upright, tap the barrel to float bubbles to the top, and push the plunger gently until they’re gone and the fluid sits at your exact dose line. Prefilled pens skip this step; follow the manufacturer’s priming instructions instead.
3. Clean the site. Wipe the chosen spot with an alcohol swab in a circular motion from the centre outward, then let it air-dry completely. Injecting through wet alcohol stings and can irritate the skin.
4. Pinch a fold. Grab a 1 to 2 inch (2.5 to 5 cm) skinfold between your thumb and forefinger. This lifts the fat layer away from the muscle underneath, which is exactly where the peptide needs to land.
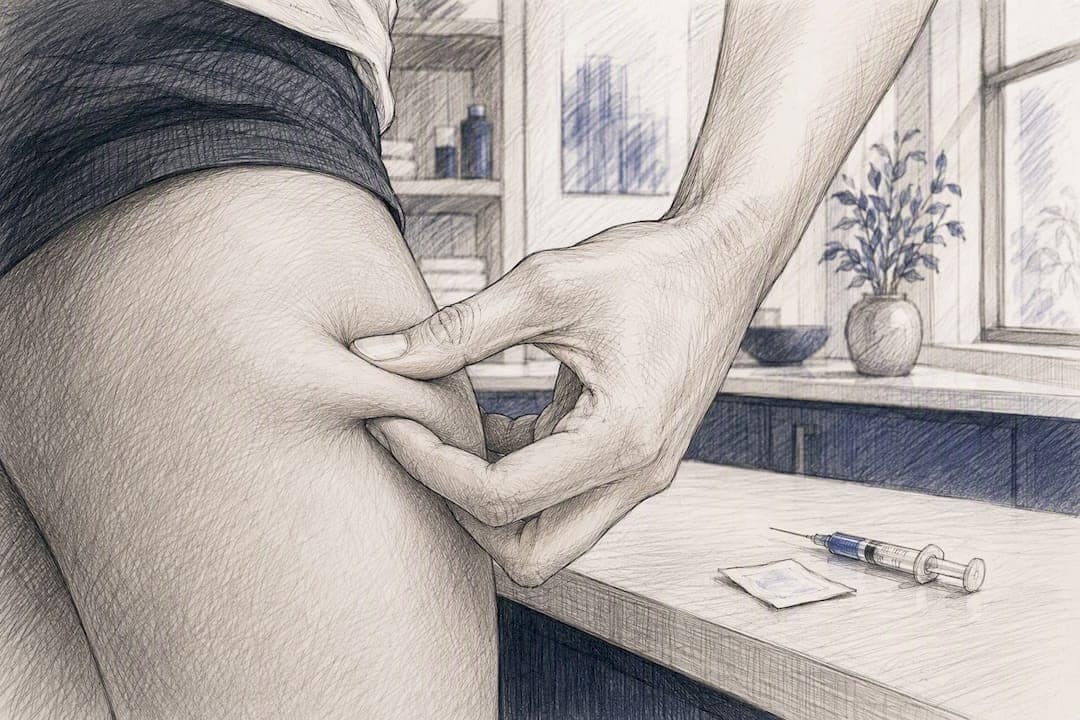
5. Insert at the right angle. Most people insert at 90 degrees straight down. If you’re very lean and don’t have much fold to pinch, 45 degrees keeps the needle from hitting muscle.
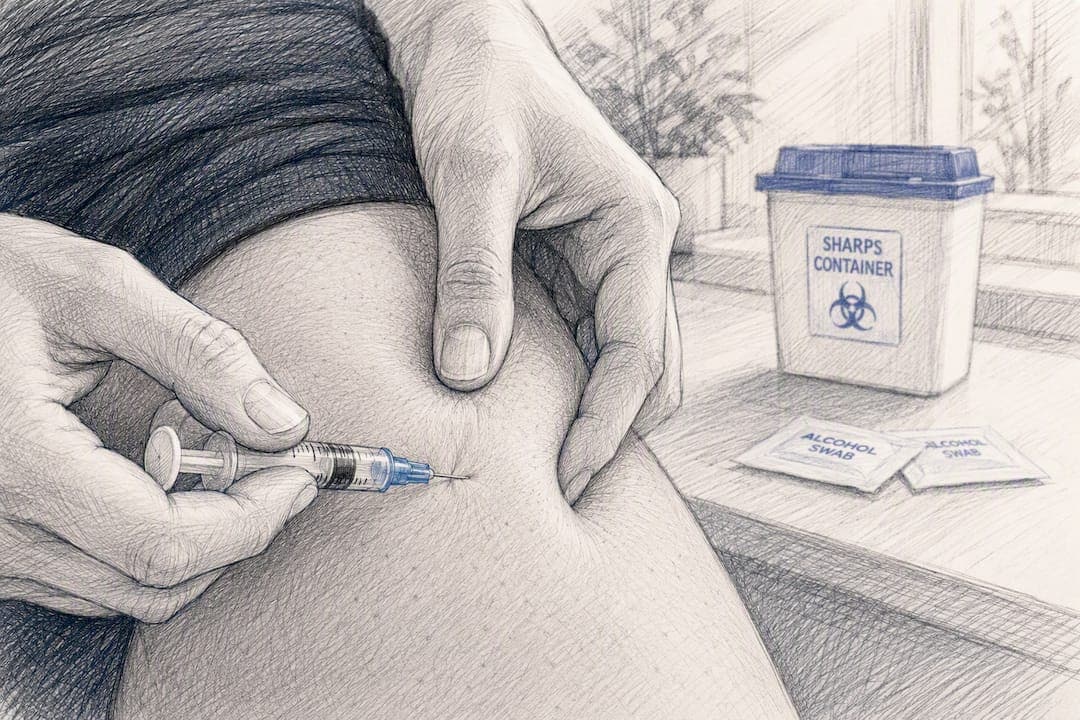
6. Inject slowly. Push the plunger at a steady, unhurried pace, roughly 5 to 10 seconds for a typical dose. Fast injections push more fluid into a smaller space and tend to sting and bruise more.
7. Withdraw straight out. Pull the needle out along the same line it went in, release your pinch, and press a piece of gauze over the site for a few seconds. Don’t rub, just apply gentle pressure.
8. Dispose of the needle immediately. Straight into the sharps container, no recapping, no setting it down “for a second.” That’s when accidental needle-sticks happen.
The Johns Hopkins Wellbeing patient guide and MSKCC’s step-by-step instructions both walk through this same sequence for prefilled syringes, with one caveat worth flagging: some medications (certain anticoagulants, for instance) specifically warn against pressing on the site afterward. Read your product’s insert before you assume gauze and pressure applies universally.
Pro Tip: Have your prescriber or a pharmacist demonstrate the very first injection in person. Watching a video is fine for review, but nothing replaces someone correcting your angle or grip in real time.
What needle gauge and length work best for subcutaneous peptides?
Thinner, shorter needles cause less pain and carry less risk of accidentally hitting muscle. That’s the whole logic behind the standard sizing for subcutaneous peptide work, and it’s backed by the same needle specs Johns Hopkins recommends for self-administered injections generally.
| Needle spec | Typical use case | Recommended angle |
|---|---|---|
| 31G, 5/16 inch (8 mm) | Average build, standard pinch of 1 to 2 inches | 90 degrees |
| 29 to 31 gauge, 5/16 inch | Slightly deeper fat pad or pen-device cartridges | 90 degrees |
| 29 to 31G, shorter length | Very lean individuals with minimal pinchable fold | 45 degrees |
The angle decision comes down to how much tissue you can actually grab, not a fixed rule. If your pinch feels thin and you’re worried about going too deep, 45 degrees is the safer default.
Pro Tip: Swap needles after every injection, not just when they feel dull. Repeated use bends the tip microscopically, and that’s what turns a quick jab into a painful one.
How often should you rotate injection sites?
Move at least 1 inch, roughly a finger-width, from your last injection point every time. Give any single spot about a week to recover before you return to it. That spacing rule comes straight from MedlinePlus’s patient instructions and is echoed in most clinical self-injection guides.
A simple grid keeps this manageable without overthinking it:
- Left upper abdomen → right upper abdomen → left lower abdomen → right lower abdomen
- Left flank → right flank
- Left outer thigh → right outer thigh
- Upper arms (if someone can assist)
Cycle through that order daily and by the time you’re back to your starting point, roughly a week has passed. Guides built specifically around peptide protocols recommend exactly this kind of grid because it removes the guesswork of “did I already use this spot.”
Track it. A phone note with the date, zone, and side takes ten seconds to update and saves you from the mistake of hitting the same quarter-inch of skin three days running. Some people prefer a printed body map with a pen, marking an X and the date each time.
Pro Tip: If you’re injecting daily, keep the tracking dead simple: date, zone, left or right. Anything more complicated and you’ll stop doing it within a week.
How do you deal with injection soreness or bruising?
A little soreness or a small bruise the next day is normal and not a reason to worry. Persistent severe pain, spreading redness, or fever is a different story, and that calls for a clinician, not a home remedy.
- Inject slowly. Rushing the plunger is one of the most common causes of unnecessary stinging.
- Ice the site for a minute or two before injecting if you’re especially needle-sensitive.
- Rotate away from any spot that still feels tender from the last injection, even if your schedule says it’s technically due.
- Only use a topical numbing product if your prescriber has specifically approved it for your peptide.
Lipohypertrophy, the lumpy tissue buildup from injecting the same spot too often, affects absorption long before it’s visible, so soreness that keeps returning to the exact same patch of skin is worth mentioning at your next check-in.
When should you stop and call a clinician?
Contact your prescriber or seek urgent care if you notice severe pain, spreading redness, fever, bleeding that won’t stop, or any sign of an allergic reaction. The same applies if you realize you’ve injected the wrong dose or the wrong medication entirely.
- Stop injecting into that site immediately
- Keep the area clean and don’t apply anything else to it
- Save the packaging and note the time and dose you used
- Call same-day if redness is spreading or you’re developing a fever
Pro Tip: Program your prescriber’s after-hours line into your phone before you ever need it. Fumbling for a number while you’re worried is the worst time to search.
How should you store and dispose of your supplies?
Store your peptide exactly as the label says, some require refrigeration, others are stable at room temperature once reconstituted, and keep everything out of reach of children. Needles and used syringes belong in a proper, labelled sharps container from the moment you’re done with them.
- Once your sharps container is full, most municipalities offer pharmacy return programs or hazardous-waste drop-off points; check your local rules
- Never toss loose needles in household trash
- Keep vials away from direct sunlight and heat, including car interiors in summer
- Never reuse a needle, even “just this once”
If you’re ever unsure whether a supply falls under regulated medical waste in your area, your pharmacist can tell you in under a minute.
Pro Tip: Keep your sharps container somewhere consistent, like a bathroom cabinet shelf, so you’re not hunting for it after every injection.
Why does rotating injection sites actually matter?
Repeated injections in the same spot cause lipohypertrophy, a buildup of fatty, scarred tissue that changes how the area absorbs medication. It’s a documented clinical finding, not a theoretical risk.
The mechanism is straightforward: fat tissue that’s been punctured repeatedly develops small areas of scarring and lumpiness. Medication injected into that same patch absorbs more slowly and less predictably than it would into healthy tissue, which means your dosing becomes a guessing game even if you’re injecting the exact same amount every time.
A site affected by lipohypertrophy can remain poorly absorptive for weeks or months after the tissue damage sets in, even once you stop using it. Clinicians treat rotation as mandatory precisely because reversing that damage takes far longer than preventing it.
The clinical takeaway is simple: rotation isn’t a nice habit, it’s what keeps your dose actually doing what it’s supposed to do.
A note from Soma Peptide on injecting safely
We built our product line around purity because the compound matters, but technique matters just as much. Have your first injection demonstrated by a clinician, follow your prescriber’s instructions exactly, and treat this guide as a companion to that relationship, not a replacement for it. Soma Peptide stocks high-purity peptides and reconstitution ancillaries for when you’re ready.
Where to find validated peptides and supplies
If you need reconstitution ancillaries or high-purity compounds, Soma Peptide’s storefront lists both, but confirm you have a valid prescription or clinical guidance before ordering anything. This article is educational and doesn’t replace advice from your prescriber.
Browse the bodybuilding-focused peptide guide if you’re working through a performance protocol, or check the recovery-focused peptide options if healing is your primary goal. Every product page lists purity data and handling instructions, and Soma Peptide’s partner resource on peptide safety is worth a read if you want a second source on the fundamentals. If you’re unsure whether a specific ancillary is compatible with your peptide, reach out to customer service before you order rather than guessing at checkout.
Sources
- PMC article (PMC6640874)
- Subcutaneous (SQ) injections: MedlinePlus patient instructions
- Subcutaneous injections: Cleveland Clinic
- Instructions for self-administered subcutaneous injections (Johns Hopkins Wellbeing PDF)
- How to give yourself a subcutaneous injection using a prefilled syringe (MSKCC)
FAQ
Where is the best place to do a peptide shot?
The abdomen is usually easiest to self-inject because you can see and pinch it with one hand, but the flanks, outer thigh, and upper arm are equally valid as part of your rotation.
Does it really matter where you inject peptides?
Yes. Injecting the same spot repeatedly causes lipohypertrophy, which slows and complicates absorption, so rotating sites keeps your dosing predictable.
Can you inject peptides into the muscle?
Most peptides are designed for subcutaneous injection into fat, not muscle; intramuscular administration should only happen if your prescriber specifically directs it and shows you the correct technique.
Should you inject peptides slowly or quickly?
Slowly. Pushing the plunger over roughly 5 to 10 seconds reduces stinging, bruising, and the pressure sensation that comes with forcing fluid into tissue too fast.
How do I know if my injection technique is wrong?
Persistent leakage, spreading bruising, or a lump that doesn’t fade after a few days suggests something in your angle, pinch, or site choice needs adjusting, and it’s worth reviewing with your prescriber or having them re-demonstrate the technique.