


For most subcutaneous peptide doses, the right tool is a fixed-needle U-100 insulin syringe sized to your dose (0.3, 0.5, or 1.0 mL), paired with a separate 3 to 5 mL Luer-lock syringe for reconstitution only. Follow sterile technique every time, calculate units from mcg before you draw a single drop, rotate your injection sites, and dispose of every needle in a proper sharps container. Get those five things right and the rest of this peptide syringes guide is just refinement.
TL;DR:
- Using a fixed-needle U-100 insulin syringe (0.3, 0.5, or 1.0 mL) is essential for accurate dosing and to preserve needle sharpness.
- A sturdy 18 to 21G Luer-lock syringe with an 8 to 12.7 mm needle must be used for safe reconstitution, avoiding rubber coring.
- Reconstitute peptides by injecting bacteriostatic water gently along the vial wall and swirling, not shaking, to preserve protein structure.
- Peptide concentrations must be written directly on the vial in mcg per mL for precise dose calculation when converting micrograms to syringe units.
- Store reconstituted peptides in the refrigerator for up to two to four weeks, never freeze them, and dispose of all needles safely in a puncture-proof sharps container.
Table of Contents
- What supplies do you need before your first injection?
- How do you reconstitute a lyophilized peptide safely?
- What syringe size and needle gauge should you use?
- How do you convert mcg to units on a syringe?
- What’s the correct injection technique and where should you inject?
- How should you store peptides and dispose of syringes?
- What are common side effects, and when should you call a doctor?
- Why trust this peptide syringes guide?
- What actually helps on your first injection
- Where to find the supplies from this guide
- Sources
- FAQ
What supplies do you need before your first injection?
Reconstituting and injecting a peptide safely takes more than a vial and a syringe. Lay everything out before you touch the vial stopper, because hunting for an alcohol swab mid-process is how contamination happens.
Here’s the full list:
- Your lyophilized peptide vial and bacteriostatic water
- One 3 to 5 mL Luer-lock syringe with an 18 to 21G needle, for reconstitution only
- Insulin syringes in 0.3, 0.5, and 1.0 mL sizes, for drawing and injecting the actual dose
- Alcohol swabs (several, not one)
- Gauze or a cotton ball
- A rigid sharps container
That reconstitution syringe matters more than it looks. Insulin needles are thin and built for skin, not for repeatedly punching through a rubber vial stopper, which can dull the tip or shave off tiny pieces of rubber (called “coring”) that end up floating in your peptide solution. A sturdier 18 to 21G needle on the Luer-lock syringe handles that job cleanly, then you switch to the fine insulin needle only for the parts that touch your skin.
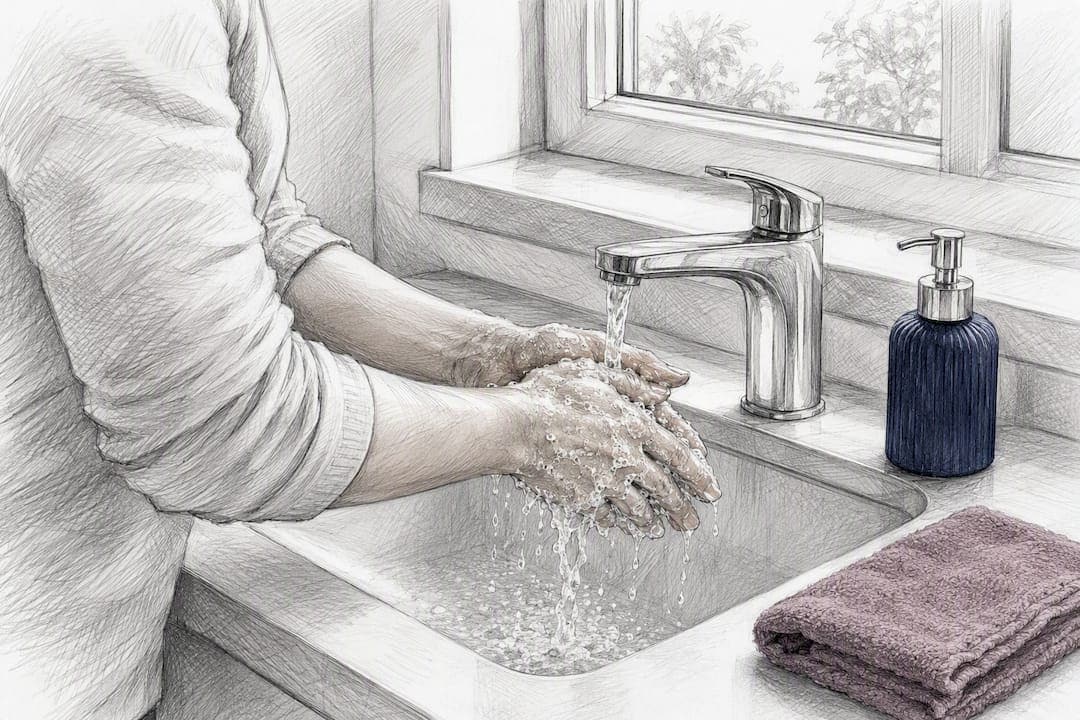
Prep the room, too. Wash your hands for a full 20 seconds, wipe down a flat surface, and get decent lighting. If your peptide vial has been in the fridge, let it sit for a few minutes to approach room temperature. Cold solution can sting more and is slightly harder to draw accurately.
How do you reconstitute a lyophilized peptide safely?
Reconstitution is the step where most beginners either overthink it or rush it. Neither works. The sequence below keeps the process sterile and keeps your dosing math clean from the start.
- Wipe the rubber stopper on both the peptide vial and the bacteriostatic water vial with a fresh alcohol swab, and let it air dry for a few seconds.
- Draw air into your 3 to 5 mL Luer-lock syringe equal to the amount of water you plan to add.
- Inject that air into the bacteriostatic water vial to equalize pressure, then draw out your intended volume.
- Inject that air into the peptide vial first, then slowly draw the bacteriostatic water back out.
- Insert the needle into the peptide vial and let the liquid run down the inside wall of the glass rather than blasting it directly onto the powder.
- Swirl the vial gently between your palms. Never shake it. Peptides are proteins, and shaking can break their molecular structure.
- Once the powder is fully dissolved, label the vial immediately with the date, the total mcg or mg on the label, and the mL of water you added, so you always know the concentration.
This two-syringe approach, using the wider-gauge Luer-lock for reconstitution and reserving your insulin syringes for injection, keeps the fine needles sharp and avoids stopper coring altogether.
Once mixed, most reconstituted peptides belong in the refrigerator, not the freezer, and a conservative rule of thumb is to use the vial within a few weeks unless the supplier’s own literature specifies otherwise. Unopened, lyophilized peptide typically stores in the fridge or freezer for far longer, but check the product label for the specific compound.
Pro Tip: Write the concentration directly on the vial in mcg per mL, not just “mixed on 2026.” Future you, doing dose math at 6 a.m., will thank present you.
For a deeper walkthrough with photos and compound-specific notes, Soma Peptide’s peptide reconstitution guide covers edge cases like partial vials and multi-use scheduling.
What syringe size and needle gauge should you use?
Syringe selection comes down to three numbers: barrel size, gauge, and needle length. Get any one of them wrong and you either waste product or make the injection more uncomfortable than it needs to be.
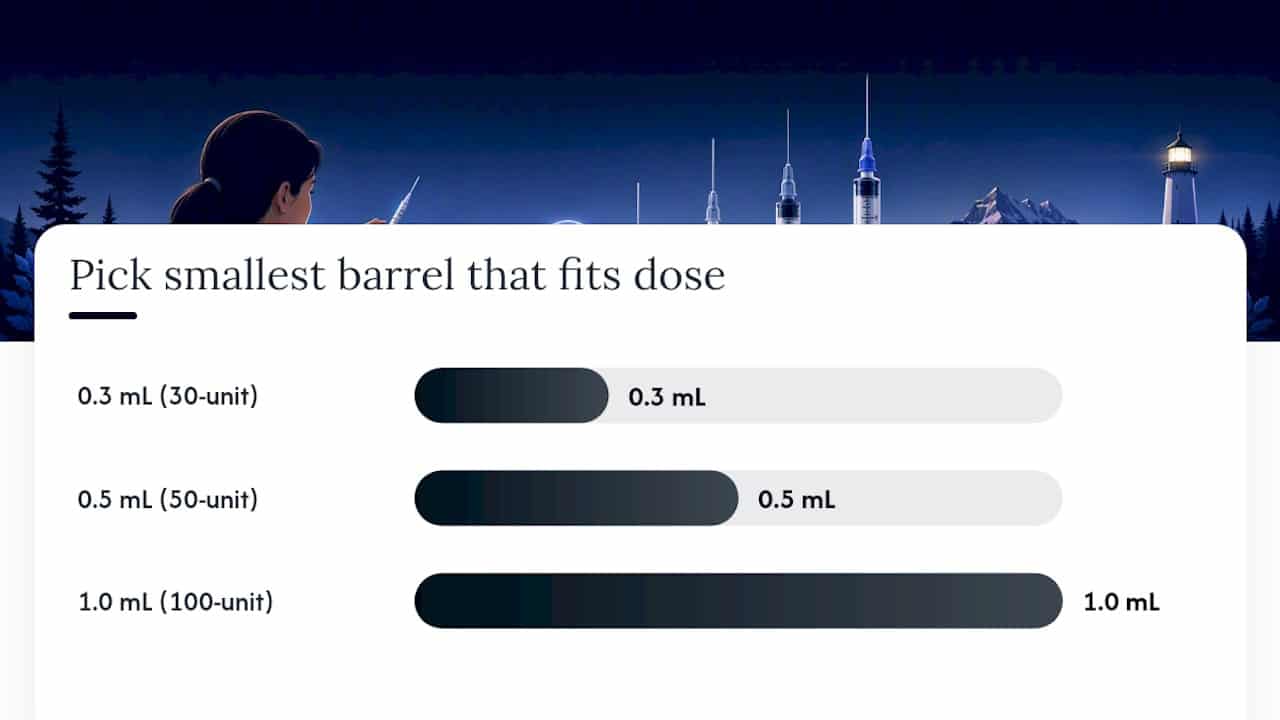
Barrel size is measured in millilitres, and U-100 insulin syringes are calibrated so that 100 units always equals 1 mL, regardless of barrel size. The rule most peptide users follow is to pick the smallest barrel that can hold your dose:
- 0.3 mL (30-unit) syringes for microdoses, where each small tick mark represents a bigger share of the total volume and gives you the most accurate read
- 0.5 mL (50-unit) syringes for the majority of standard peptide doses
- 1.0 mL (100-unit) syringes for larger reconstituted volumes or combination doses
A 0.3 mL syringe with half-unit gradations gives noticeably better readability than a 1.0 mL barrel when you’re only drawing 3 to 5 units, because the same physical distance on the plunger represents a smaller volume.
Gauge and length are the other half of the equation. Peptide injections typically use 29 to 31 gauge needles in 5/16 inch (8 mm) or 1/2 inch (12.7 mm) lengths. A 31G needle is the thinnest and generally the most comfortable option, but it also slows down your draw speed and can bend more easily if the solution is even slightly viscous. A 29G needle draws faster and handles thicker solutions with less risk of bending, at the cost of being marginally more noticeable going in. Needle length depends partly on body composition: 5/16 inch suits most subcutaneous injections in leaner tissue, while 1/2 inch gives a bit more margin for someone with more subcutaneous fat.
There’s also the question of dead space, which is the leftover fluid trapped in the syringe hub and needle after you’ve pushed the plunger all the way. Fixed-needle insulin syringes have close to zero dead space, while detachable Luer-needle systems can trap 0.05 to 0.15 mL of solution that never makes it into your body. On a full 1 mL insulin dose that’s a rounding error. On a peptide microdose measured in a handful of units, that same trapped volume can represent a meaningful chunk of your actual dose, which is exactly why fixed-needle insulin syringes, not detachable-needle setups, are the standard recommendation for peptide work. Soma Peptide’s breakdown of insulin syringe sizes walks through matching barrel and gauge to specific compounds if you want compound-by-compound guidance.
How do you convert mcg to units on a syringe?
This is the part where a lot of beginners freeze up, but the formula is genuinely simple once you’ve done it once:
Units to draw = (desired dose in mcg ÷ concentration in mcg per mL) × 100
Say you reconstituted a 5 mg (5,000 mcg) vial with 1 mL of bacteriostatic water, giving you a concentration of 5,000 mcg/mL. If your target dose is 500 mcg, the math looks like this:
| Step | Calculation | Result |
|---|---|---|
| Concentration | 5,000 mcg ÷ 1 mL | 5,000 mcg/mL |
| Dose target | 500 mcg | 500 mcg |
| Formula applied | (500 ÷ 5,000) × 100 | 10 units |
So you’d draw exactly 10 units on a U-100 insulin syringe. If your target dose were a microdose of, say, 100 mcg from that same vial, you’d land on 2 units, which is where a 0.3 mL syringe with half-unit markings earns its place over a 1.0 mL barrel.
Before you inject, flick the syringe gently to move any air bubbles to the top and push them out with a small amount of plunger pressure. Hold the syringe at eye level and read the units from the leading edge of the plunger, not the top. And treat every syringe as single-use. Reusing one, even on yourself, dulls the needle and raises infection risk.
What’s the correct injection technique and where should you inject?
Subcutaneous peptide injections go into the fatty layer just under the skin, and the most common sites are the abdomen (at least two inches from the belly button), the front of the thigh, and the back of the upper arm. Rotating between these sites, and moving to a slightly different spot within each site every time, prevents the skin thickening and scar tissue known as lipodystrophy that shows up with repeated injections in the exact same spot. Keeping a simple log, even just a note on your phone of date and location, makes rotation automatic instead of something you have to remember cold.
Here’s the actual injection sequence:
- Wipe the injection site with an alcohol swab and let it air dry completely.
- Pinch a fold of skin between two fingers to lift the fatty tissue away from muscle.
- Insert the needle at a 45 to 90 degree angle, depending on needle length and how much tissue you’re pinching. Shorter 5/16 inch needles often go in at 90 degrees; longer needles may need 45 degrees on leaner areas.
- Push the plunger down slowly and steadily. Rushing this step is the single most common technique mistake beginners make.
- Wait a couple of seconds after the plunger bottoms out before withdrawing, to reduce any backflow.
- Withdraw the needle at the same angle you inserted it, then press gauze gently over the site. Don’t rub.
Peer-reviewed guidance on injection technique and site selection backs this same sequence for subcutaneous injections generally, which is reassuring if you’ve never done this before and want to know the steps aren’t improvised. If body composition is leaner in one rotation site than another, that’s a legitimate reason to switch to a shorter needle there rather than force a longer one through minimal tissue. For a fuller comparison of injection routes, Soma Peptide’s guide on subcutaneous versus intramuscular delivery explains when your prescribing clinician might specify one over the other.
Pro Tip: If a site feels unusually tender or looks slightly bruised from your last injection, skip it this round even if your rotation schedule says otherwise. One extra day of healing costs you nothing.
How should you store peptides and dispose of syringes?
Unopened, lyophilized peptide vials generally last longest in the refrigerator or freezer, exactly as the supplier’s packaging specifies, but never let them freeze once reconstituted. Once you’ve mixed a vial with bacteriostatic water, keep it refrigerated and treat two to four weeks as a conservative outer limit unless labelling says otherwise. Label every reconstituted vial with the date and concentration the moment you finish mixing it, not later.
For disposal:
- Drop used needles and syringes straight into a rigid, puncture-proof sharps container. Never toss loose needles in household trash.
- Once the container is roughly three-quarters full, seal it and take it to a local pharmacy or community drop-off point.
- Safeneedledisposal lists disposal sites and mail-back programs by location if you’re unsure where your nearest option is.
- Treat every syringe, insulin or Luer-lock, as single-use. Reusing one is a false economy that raises both infection risk and dosing inaccuracy.
What are common side effects, and when should you call a doctor?
Mild bruising, a small red bump, or minor soreness at the injection site for a day or two is routine and usually resolves with rest and site rotation. Warm the area if it’s just stiff, and switch to a different site next time.
What isn’t routine: spreading redness, warmth, or swelling that gets worse rather than better over 24 to 48 hours, fever, pus, or a site that feels increasingly hot to the touch. Those are signs of possible infection and warrant a call to your prescribing clinician, not a wait-and-see approach. Hives, facial swelling, or trouble breathing after an injection are signs of a possible allergic reaction and need immediate medical attention. Peer-reviewed literature on injection-related complications outlines these same red flags for subcutaneous injections broadly.
If you suspect a dosing error, drew the wrong concentration, or think a vial may have been contaminated, don’t guess your way through it. Contact the clinician who prescribed your protocol and describe exactly what happened.
Why trust this peptide syringes guide?
Beyond products, the site maintains dosing and technique resources for readers who want compound-specific protocols rather than general guidance alone.
What actually helps on your first injection
The biggest anxiety killer isn’t confidence, it’s sequence. Lay out every supply in the order you’ll use it, and label the vial the second you finish mixing it, before you set it down or get distracted. The single most common beginner mistake is rushing the unit calculation because the needle is already in hand. Slow down, do the math first, and always run peptide-specific dosing past the clinician who prescribed your protocol. They know your specific compound and history better than any general guide can.
— Soma Peptide
Where to find the supplies from this guide
Everything covered here, insulin syringes in 0.3, 0.5, and 1.0 mL sizes, bacteriostatic water, and alcohol swabs, is available through Soma Peptide alongside the peptides themselves, which means you’re not piecing together your kit from three different sellers. If you’re working toward a muscle or recovery goal specifically, the peptides for muscle category page breaks down which compounds pair with which protocols. Talk to your prescribing clinician about your specific dose before ordering, then use that conversation to guide which product and syringe sizes you select.
This article is general information, not a substitute for advice from a qualified doctor. Consult a qualified healthcare professional about your own circumstances before acting on anything here.
Sources
- PubMed article relevant to injection technique
- PubMed article on injection-related complications
- Safeneedledisposal
- Minimizing medication waste: the impact of syringe dead space | BulkSyringes
- Peptide syringe and needle sizes explained: mL, gauge, and needle length | Vitality Medical
FAQ
What size syringe should I use for injecting peptides?
Choose the smallest U-100 insulin syringe that holds your full dose. That’s usually 0.3 mL for microdoses, 0.5 mL for typical doses, and 1.0 mL for larger reconstituted volumes.
Is 30 or 31 gauge better for peptides?
Both work well; 31G is slightly more comfortable but draws more slowly and can bend with thicker solutions, while 30G draws faster with a bit more sensation on insertion.
How do I measure peptides in a syringe?
Use the formula (desired mcg ÷ concentration in mcg per mL) × 100 to get your unit count, then read the dose from the leading edge of the plunger at eye level after clearing air bubbles.
What syringes should I use for reconstituting peptides?
Use a separate 3 to 5 mL Luer-lock syringe with an 18 to 21G needle to add bacteriostatic water, then switch to your fixed-needle insulin syringe only for drawing the injection dose.
How long does a reconstituted peptide vial last?
Refrigerate immediately after mixing and treat two to four weeks as a conservative limit, though some products specify differently on their labelling. Never freeze a reconstituted vial.